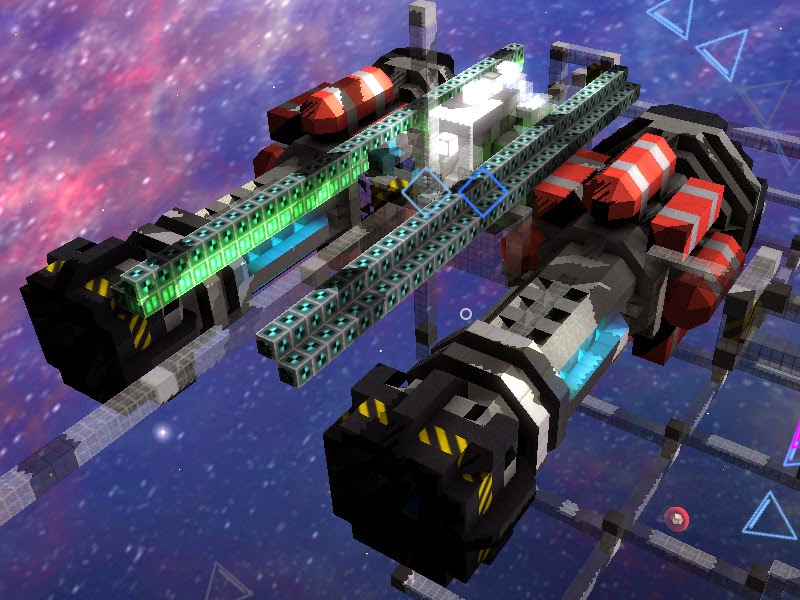
Showing posts with label escape pod. Show all posts

Monday, January 26, 2015

Experimental Escape Pod and Hatch

The original plan for FRG Thor included plans for an Officer's Escape Pod (all crew on this automated vessel are designated officers) located at the aft dorsal section of the ship, just behind the Obs Deck, shielded by a mirrored set of blast barriers and covered by an armored escape hatch that would detonate free in the event of escape-pod launch.

It was ambitious and new, but Thor's design and build went ahead anyway, knowing that it could be altered if for some reason it was unable to be achieved.

With the completion of the Obs Deck, Bridge, and internal areas around the area that the Escape Pod would be located, it was now time to build the Pod as well as the Escape Pod bay, and that meant tackling the hairy prospect of a seperate detonating escape pod hatch.

Between the Blast Barriers set just back from the Obs Deck the Escape Pod Hatchway and Pod Bay was created.
The internals of the Pod Bay don't need to be armoured and so are quite raw, in a similar style to CRV Alannis.
Once the Pod Bay was created (which had been done similarly to the Escape Pod Bay of CRV Alannis), it was time to see if I would be able to successfully attach a hatch to the hatchway and pod while it was docked during standard operations.

Proof of concept was a success!  A hatch could be successfully docked to a docked escape pod.

The underside of the hatch, docked to the Mock Pod to gauge depth requirement of Pod.
The mock pod docked to the base of the Escape Pod Bay.
Now that I knew it was possible, it was time to build the escape pod.  Rather than build it within the confines of the Escape Pod Bay within FRG Thor, I decided to manufacture the Pod on a small addition off to the side of the shipyard, to the stern of Thor. Once completed the Pod and Hatch would be manuevered into position, however manufacturing it in space rather than in the bay meant greater visibility and access.

Escape Pod and Hatch was manufactured in a new small additional wing to the shipyard.
The Escape Pod was a basic design, fully armoured, fit with highly maneuverable engines, and a radar jammer to assist escape.  The Hatch was the original design cut and moved from the top of Thor and fit with the necessary docking systems.
The interior of the Escape Pod is cramped but functions perfectly to rescue all six crew members.
The Escape Pod fits 6 people with the possibility of a further three under extreme conditions.  1 to enter the Core and pilot it, four seated on the red seats, and 1 to 3 standing on the Core between the seated passengers.  The interior of the single-layer armour was fitted with as many shields as possible in the cramped space, giving the Escape Pod the greatest possible chance for escape during a battle scenerio.  The exact specifications of the shielding are kept as a closely guarded secret to help any passengers survive an attack.

The entrance to the pod was closed behind a new armoured Blast Door manufactured specifically for the Pod.

Now that the Pod was completed, it was time to manuever the Pod into the Pod Bay, ready for active duty.

Escape Pod and Hatch are maneuvered into position above the Pod Bay, ready for insertion.
Hatch is detached and Pod is inserted into the Pod Bay.
Pod in final operational position, with Hatch removed.
Once the Pod was inserted, docked, and wired into Thor's systems, it was time to cover her with the armoured Hatch that would protect the Pod during combat operations.

Hatch has final additions fitted to it so it covers the Pod Bay securely.

View from within Pod Bay as Hatch is maneuvered into position.
Hatch being moved into final position as seen from the shipyard.
Hatch fitted successfully, with Pod secured and wired in.
The internal view of the Escape Pod Bay, showing the Hatch in place and the Blast Doors open on the Pod ready to receive passengers.  The fore-side panels of the Escape Pod Bay still need to be fitted and aligned to the escape passages as they are built.
So the overall build was a success.  An experimental design that I did not know would succeed in fact succeeded.  I was pleased that my efforts had not been in vain, and set about finalising the escape passageways leading from the Bridge and the rest of the frigate's internals.

Wednesday, January 21, 2015

FRG Thor

With the resources gathered from the destroyed Gundabadt Station by SVG Excavator, I began construction on my biggest build to date - my first frigate, FRG Thor.
Early build of FRG Thor showing armour, basic fuselage nose rocket launcher and some computer systems installed.


She was planned to build on what I had learned about missiles from my turret building, by multiplied many times over.  I discovered that by altering the composition and layout of missile systems that I could fire massively powerful rockets at a target and inflict considerable damage.

Thor, therefore, would house the single biggest rocket launcher I had ever seen.

But not only would she be a rocket frigate, she would also boast some impressive shielding, radar jamming, and be supported by side, rear, upward and downward firing homing missile bays as auxilliary weapons.  In addition to all this I intended to build some very small missile-killer turrets... although I was concerned that I may not be able to program them to differentiate between my missiles and those of the enemy which would be pretty useless to me... worst case I would outfit them to be EMP weapons instead.

Although Thor would be completed automated, I was building her to also operate with a crew and serve the needs of human passengers.

When focusing on building a particular section, I place work lights so that I can easily see what I'm working on.

The work lights make all the difference to a dark or shaded hull.
The rocket launcher installed into Thor's nose measures 38m from nose to core room, and consists of 16 columns feeding into the final chamber, and costs 444750e to fire, doing 44750 damage over a 12 meter radius up to 3.2km from target.

View from Thor's incomplete rear through what will be the engines, crew facilities, support modules, escape bays, bridge, power storage, and core.  Visible in the nose section of the fuselage is the mostly completed front systems, detailed in the below images.
Forward of the Core (the top of which is visible at the bottom of the image) are 9 5x5x5 power/shield combination generators, granting a total power output of 90058.4e/sec recharge, shield cap of 18809 (+643s/sec).  Further shields will be added to the frigate.

The lower three decks of the cone will be entirely energy storage, granting an estimated 1.3 million energy storage, allowing Thor to fire her energy-hungry cannons several times before depleting her energy reserves.


Deck 4 is a missile systems inspection and engineering deck.  Full access to the entire length of the missile systems is on this deck, plus supporting systems like haudraulics and computers.  Some systems still need to be installed.
Deck 5 is to inspect the lower part of the Combination Generators and the systems linking the generators with the missile systems.
Deck 5 inspects the upper part of the Combination Generators and also accesses much of the super structure holding it all together.  Again some systems still need to be installed, mostly between the deck and pressure hull.
Deck 6 looking back towards the nose.  At the nose end are most of the computer systems driving the link between the Combination Generators, and it is also possible to watch a rocket for a split second as it fires out from beneath your feet towards a target... although it passes out of view very fast as you're basically looking down at the muzzle.
Deck 7 is not really a deck but more of a series of crawl spaces.  This deck will allow close-inspection and repair of critical systems and will be the perfect place for a Xenomorph to set up camp.  Currently it's open and unpopulated. This image shows the view from the bow to the stern, with much of this gap being filled with goodies in the coming days.
While the Core is functional, it is still under construction.  It must wait for all other critical systems to be installed before it can be finalised.
Above the Core and towards the stern, at the top of the frigate is where the Bridge will be.  Above that will be an observation deck (completed), which will be sealed behind a blast door to protect the bridge in case the observation deck becomes damaged and loses pressure.  This image shows the view upwards into the ramp leading to the observation deck from what will be the Bridge.
View back down the ramp of the Observation Deck back towards the yet-to-be-built Bridge.  The Core can be seen, which is basically at the center of the frigate.
View from the gangway in the Observation Deck, looking forward and slightly to port.
Observation Deck as seen from outside, with stern shown to the left of image.  Behind the Obs Deck can be seen the Officer's Escape Boat assembly.  This is designed to accomodate the full compliment of officers on the Bridge, and be accessed rapidly in the event of an emergency, and jettison straight upwards from the rear of the frigate and away.  Other crew have different (and closer to them) escape boats located elsewhere on the frigate.
My little collection of ships is growing.  Note: Gustav never got rebuilt after pirates decimated my base so long ago... although I do still have the plans for her if ever I want a small battle scout again.
Shipyard with FRG Thor under construction and SVG Speeder (and her homing missile turrets) acting as an outward turret emplacement during the built. My basic factory is shown on the right attached to the shipyard, busilly producing paint and converting minerals into capsules, among other things.
FRG Thor's internal computers and systems are visible and accessible from outside (which serves a purpose) but protected from attack by her shields and automated close-quarters defenses, and mostly tucked behind gauss mesh which when on active duty will have 40,000 volts passing through it at all times.
FRG Thor at about the halfway point in production.
Although Thor's armour and hull are in place, she still needs to have her Omni-direction Missile Defense System installed, as well as a bunch of blast doors and greeble and such.  She also needs all crew compartments and operational systems fitted in the center and wings, and her thrusters and other critical and support systems installed in the aft.

I expect Thor to be quite a powerful little boat once completed... and I look forward to hunting down more pirate stations and expanding my little patch of space.

Friday, January 2, 2015

Cramped Quarters

Alannis's internal systems were now fully fitted and operational (except the turret systems and the rebuild of the escape pod damaged in the first pirate wave from Gundabadt Station).

While she looked naked without her armour, the Alannis was complete inside and technically able to to fly.  Totally without teeth, but able to fly.


Her internal systems include large dual ion compression engines, energy dispersal shields, an escape pod bay, front underside hatch access, rear shielded heat dispersal radiators, thick dorsal, starboard, and portside armour plates, 4x small homing missile turrets, 1x large topside long range beam turret, top and bottom front cameras, rear camera, port and starboard cameras, and internal access to all major systems for inspection and repair from within shields while under fire.

Alannis's central core and control room.
Hatch access is in the bottom starboard side of the control room, which accesses the turret and computing maintenance area, and from there a plex door exits directly into space underneath the ship within the protection of the shield and armour.

The main deck of Alannis.
Alannis's main deck has navigation and diagnostic computers and read-outs, medical facilities, shield and gravity control, and access all areas, including the front passageways leading to the port and starboard engine maintenance (shown in picture), the port and starboard rear reactor maintenance areas, the rear escape pod passage, and the turret and computing access way underneath the main control room.
Starboard engine maintenance access passage.
Standing at the white light shown on the right of the previous picture and looking down and back along the engine, this passageway accesses all the engines on the starboard side back to the reactor.
Port passage to the reactor access passageway.
Looking immediately port of the control room the shield and gravity control panels can be seen, and behind them the passage that leads down to the port side reactor.  A mirror image passage (with slightly different systems lining it) exists on the starboard side also.
Escape Pod Bay inspection port
Standing in the passage shown in the previous image, an inspection port can be used to view the condition (or observe the docking) of small craft in the escape pod bay.
Portside reactor inspection passageway.
One of the reactor's tanks is visible on the right, with the various computer and fluid dispersal systems visible on the left and at the back of the passage.  An access metal grill hatch at the back of the passage allows a crew member to wriggle through to the rear heat-dispersal radiators if necessary.

Wednesday, December 31, 2014

Engines and escape pod completed.

 Soon enough I'd finalised the engines, and saved their design as a template for future builds.


Once the engines were completed I moved on to the escape pod, nestled between the reactors. Downward facing at the stern, the escape pod bay would be hidden behind armor and heat sinks for the reactors, and would allow a rapid escape in the event of the the Alannis going critical.

The internal access to the escape pod is also completed, including lighting.  Wiring and consoles will be added later as systems are installed. The pod has a double-thickness blast door (pre-open ready for rapid escape), radar jamming that will last for nearly 15 minutes before needing a refit, and a strong inertial destabilisation propulsion unit, all underneath thick armor. It is an escape pod designed to escape in the middle of heavy combat.
On either side of the chassis the main power systems are currently being installed.  These will drive the Alannis's shields, radar jamming, and weapons systems.